Pages

Thursday, June 26, 2014

A Coral primer on selection and care

A Coral primer on selection and care

In the reef keeping community you often hear the terms soft, LPS and SPS corals.  These are terms which are used to indentify different groups of corals.  These three general identities of groups of corals can be useful to the hobbyist when shopping for corals because it describes in general what each particular group of corals needs to survive and grow under captive systems.  These requirements can range from lighting and placement to flow rates, water parameters, feeding and chemistry.
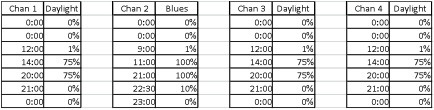
Lighting

There are three types of corals that reefers keep and the guideline below will give you a good idea of the intensity of light and flow rate each type requires.  There are other factors that can come into play here.  If light intensity is too high it can impede photosynthesis in some corals.  Corals in shallow water can experience this photoinhibition for a few hours a day but no more.  These corals are Zooanthids, Mushrooms, and Ricordea, among others.

Many corals are also adept at switching their feeding systems depending on conditions present around them.  Corals in pristine water with no food source rely heavily on light and not much on capturing organisms as a food source.  This form of feeding is called autotrophy or photosynthesis.  Corals that capture food are in the hetertrophic mode of feeding or hetertrophy and can get by with less light.

sps-corals-aquarium

Soft Corals ( Alcyonacea )  

All soft corals lack a rigid stony skeleton.  Typically soft corals require lower light intensity and moderate to low water flow.  Soft corals are generally found in shallower turbid waters which makes them more forgiving than LPS and SPS corals because pristine water quality and the chemistry required for LPS and SPS corals is not absolutely essential for their growth.  A few examples of common soft corals generally kept in the hobby include the Leathers, Zoanthids (colonial anemones and button polyps), Palythoa, Discosoma and Ricordea.   Caution should be heeded in keeping Palythoa species.  Their mucus coat contains a palytoxin which can be very dangerous to humans if allowed to get into open sores, cracks in the skin or find its way into nasal passages.  Inexpensive disposable surgical gloves are recommended when handling these corals.

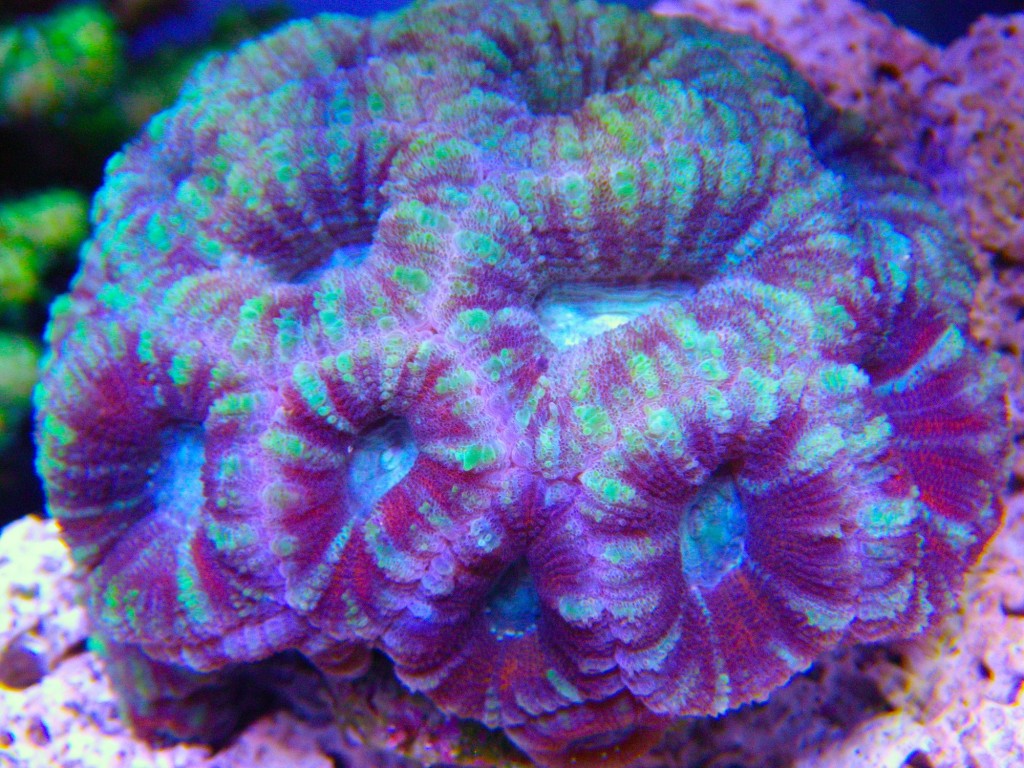
LPS (Large Polyp Stony Corals) 

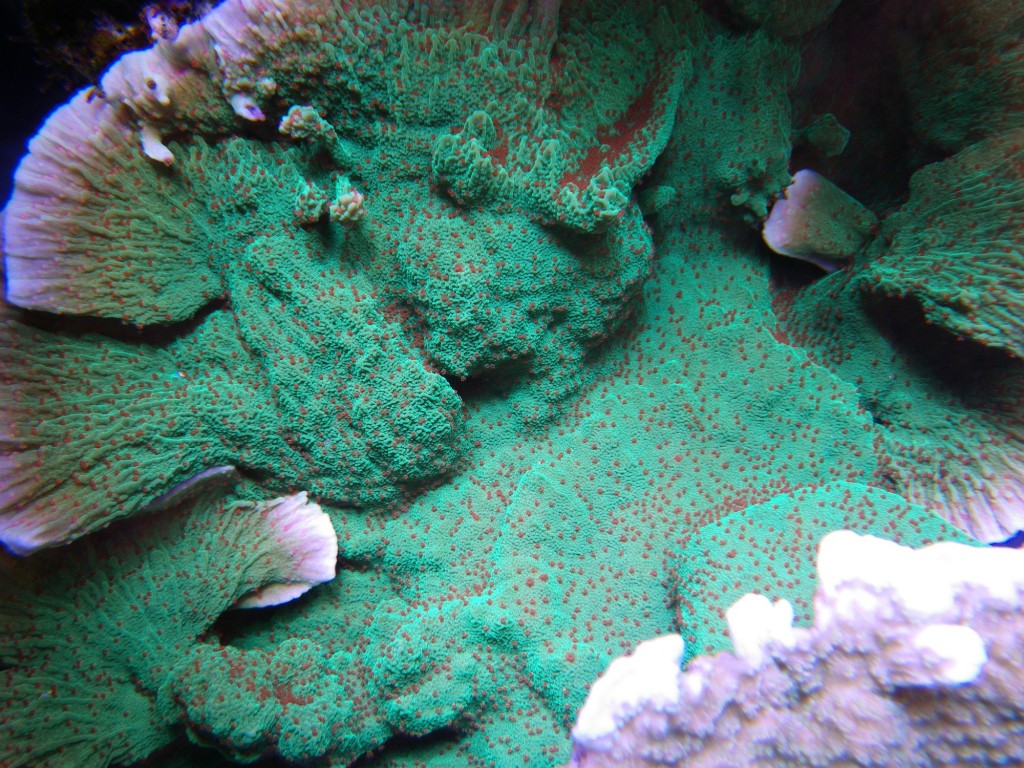
This group consists of corals with large fleshy polyps with a rigid skeleton.  This group usually requires moderate to intense light and moderate water flow rates.  This is the mid-group as far as care required to maintain healthy and reproductive colonies and is one of the most colorful groups of corals available to the hobbyist.  LPS corals that are commonly available include Acanthastrea (Acans), Euphyliids (Elegance, Torch, Hammer), Favia, Fungia, Blastomussa, Dendrophyllia and Tubastrea.  Many of the LPS corals will extend sweeper tentacles in the evening and these tentacles are quite powerful in terms of killing nearby cnidarians so care must be taken to ensure they are kept a good distance from each other.  The Euphyliids are notorious for this.

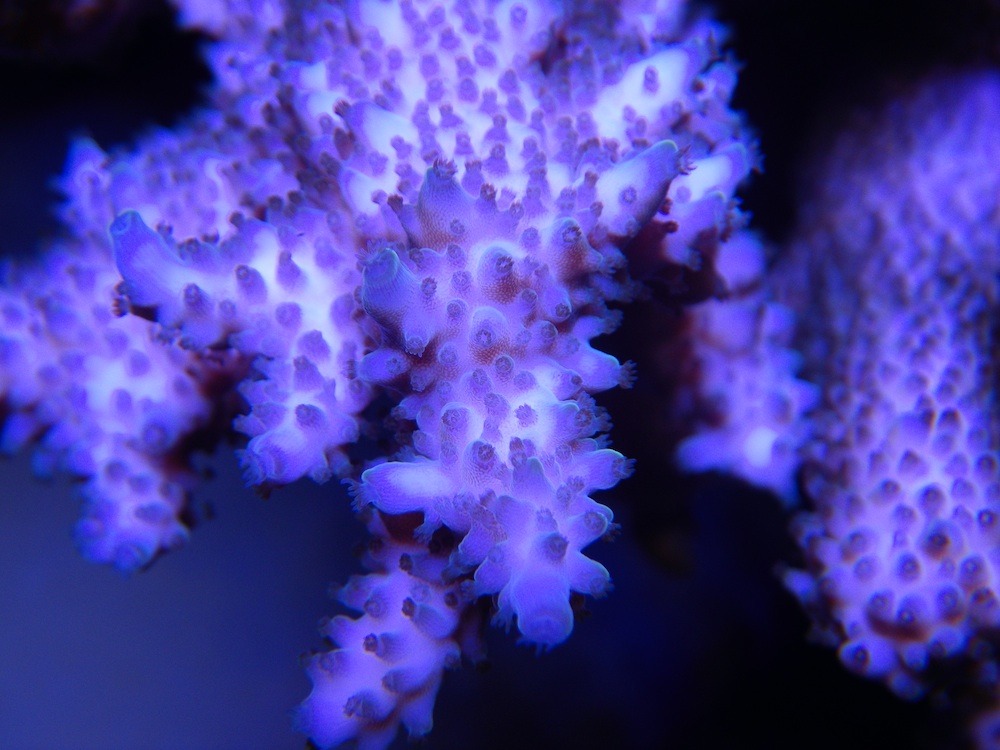
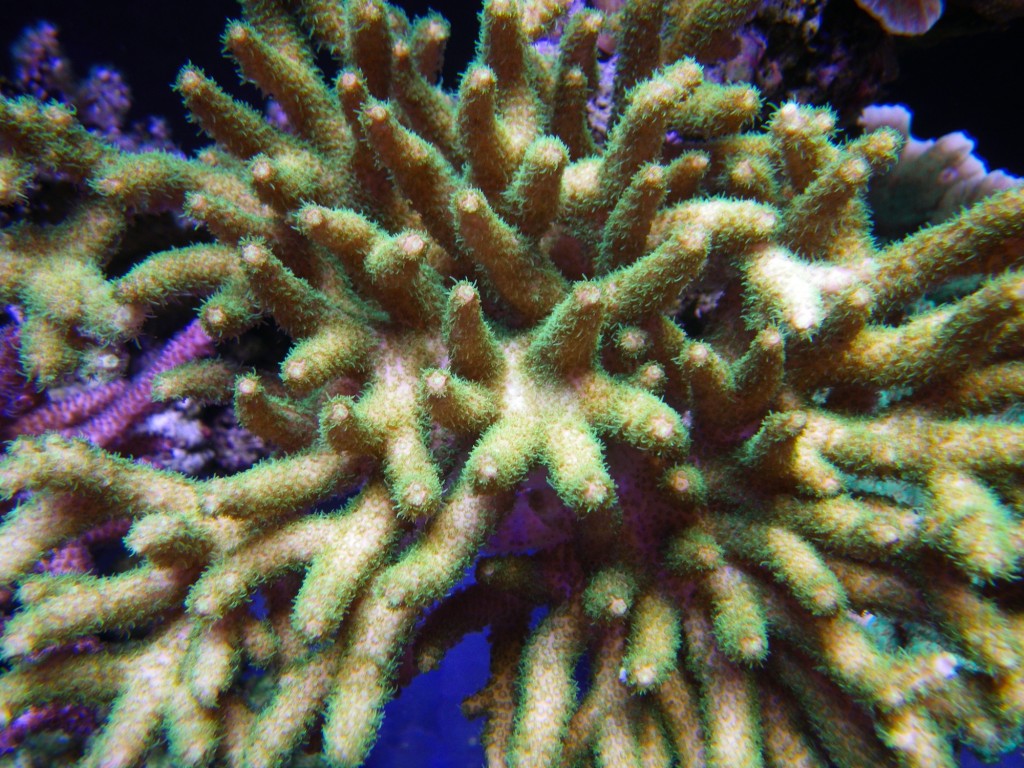
SPS (Small Polyp Stony Corals) 

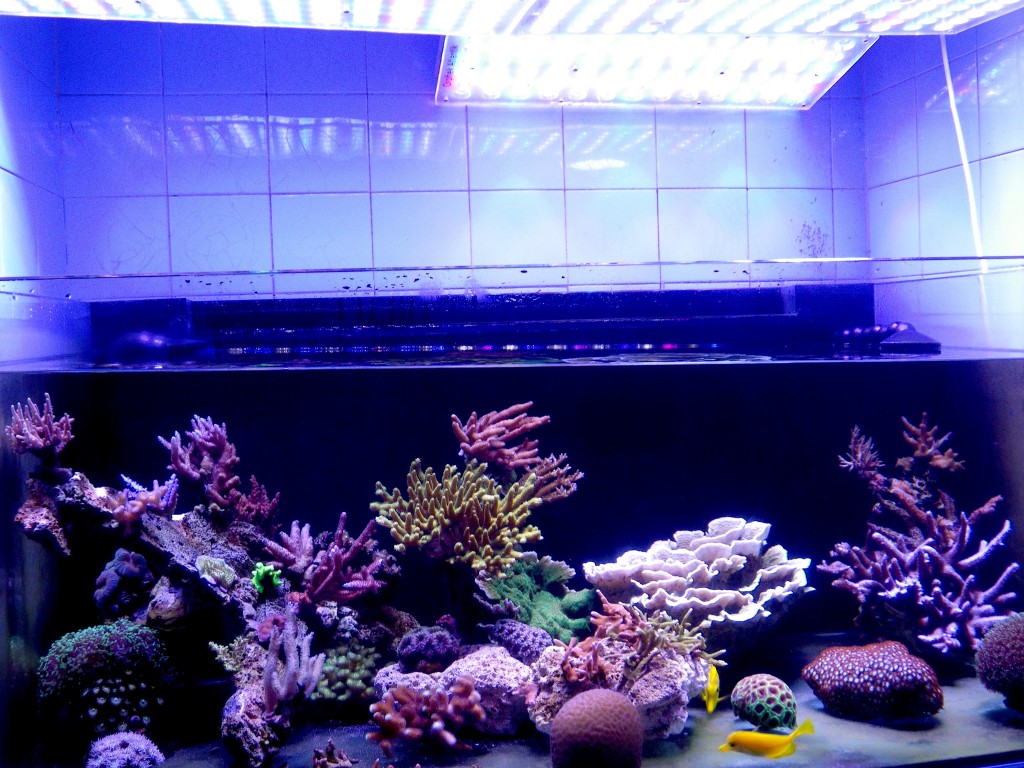
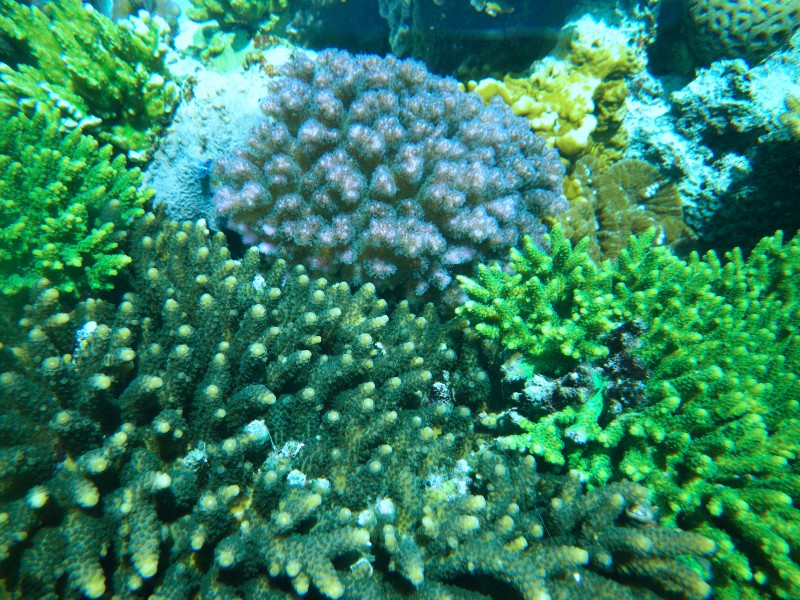
All SPS corals have a rigid skeleton composed of small polyps and thin flesh surrounding the skeleton and are among the most difficult corals to keep of the above groups.  Most if not all corals in this group require pristine water quality, high water flow, intense lighting in the PUR spectral range and well maintained water chemistry.  Any abrupt changes in water quality and parameters will cause these corals to react and is a good indication that something is amiss with water parameters and/or chemistry.  Common corals in this group include Acropora, Montipora, Pocillopora, Stylophora, and Seriatopora.

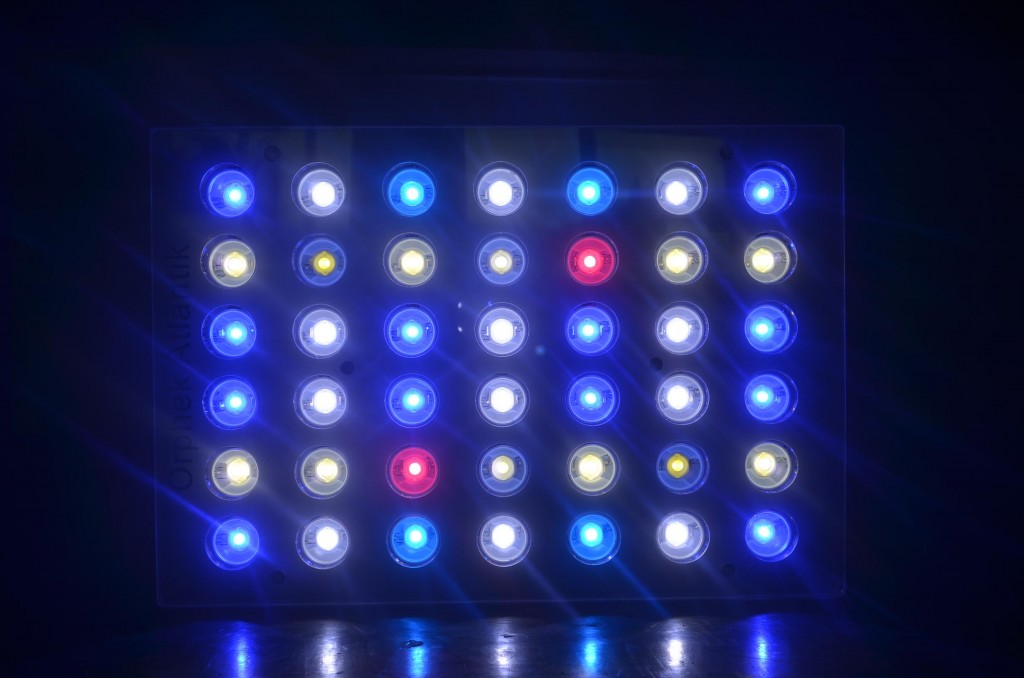
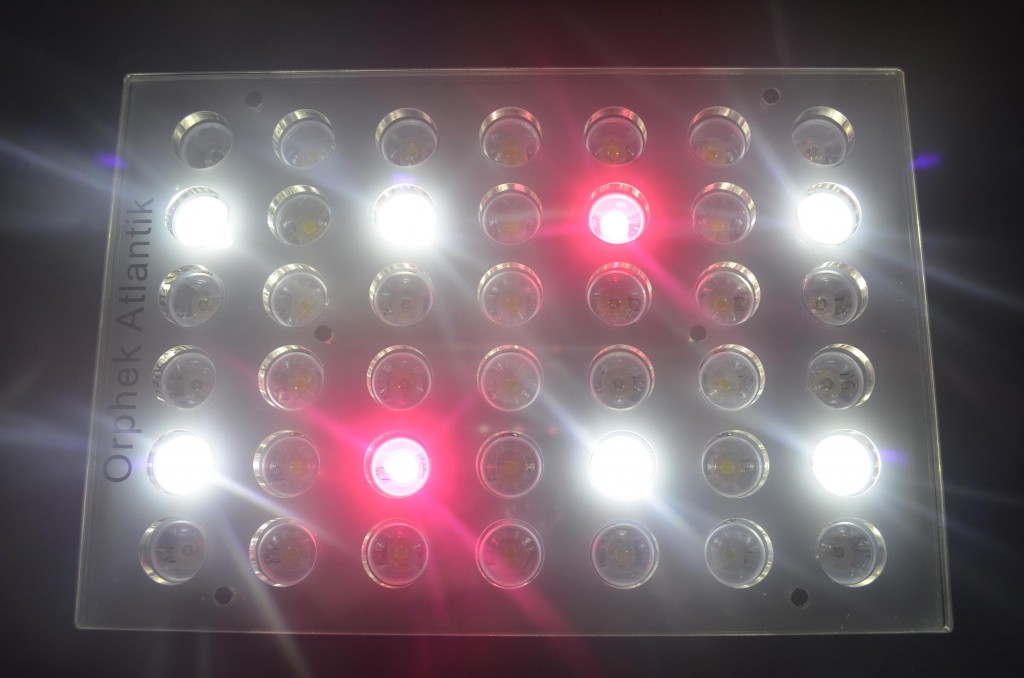
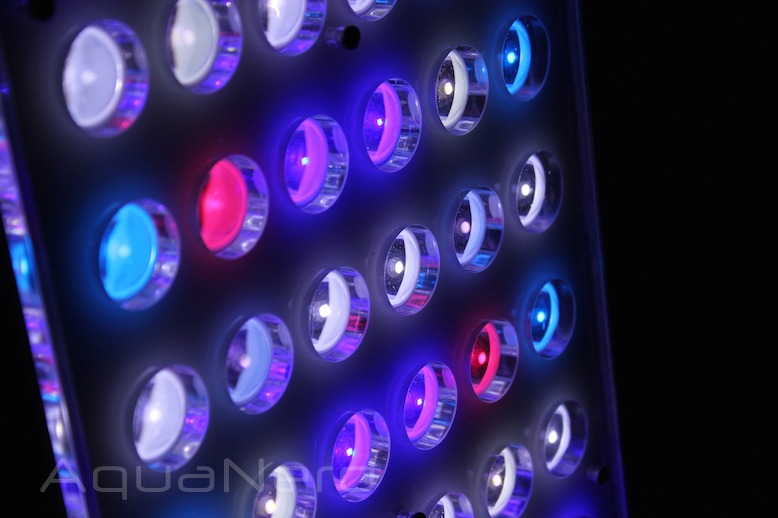
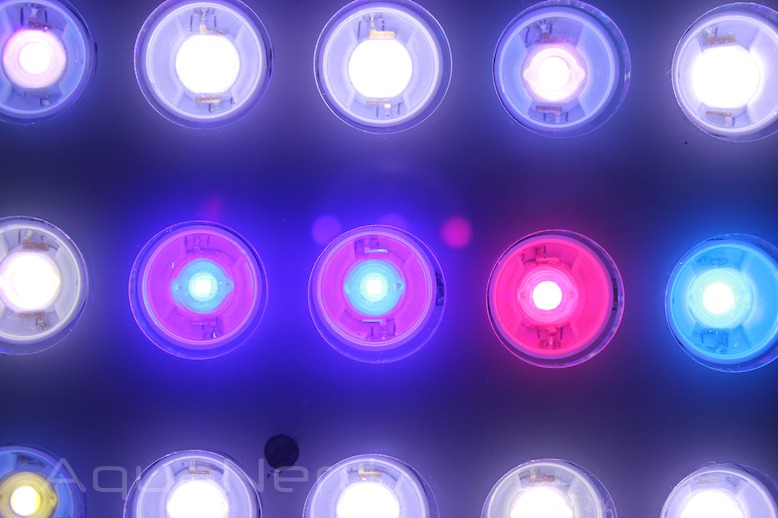
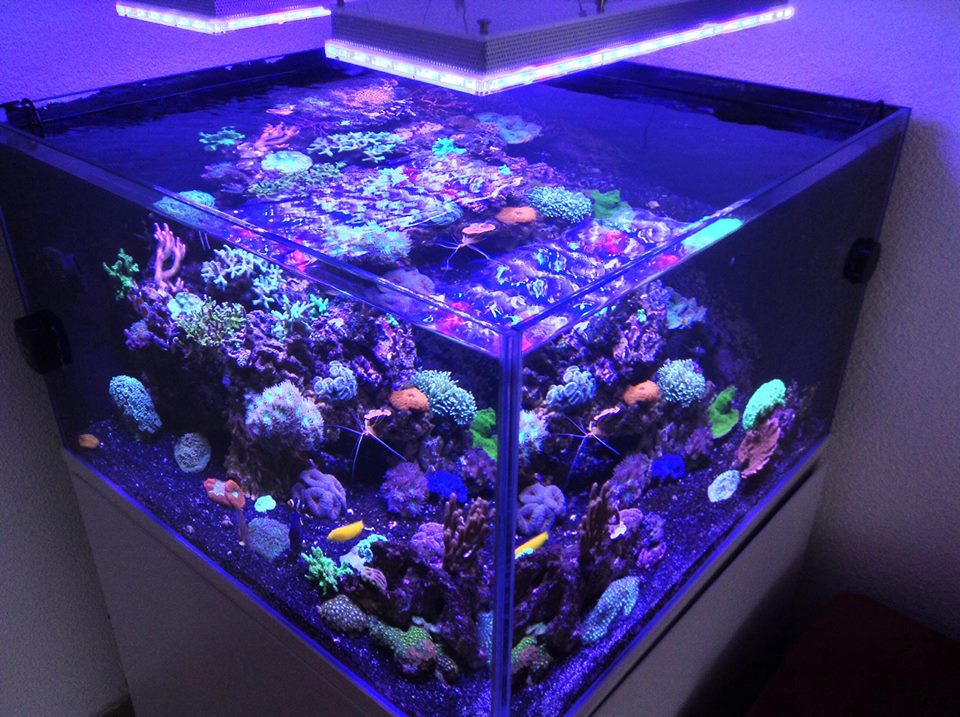
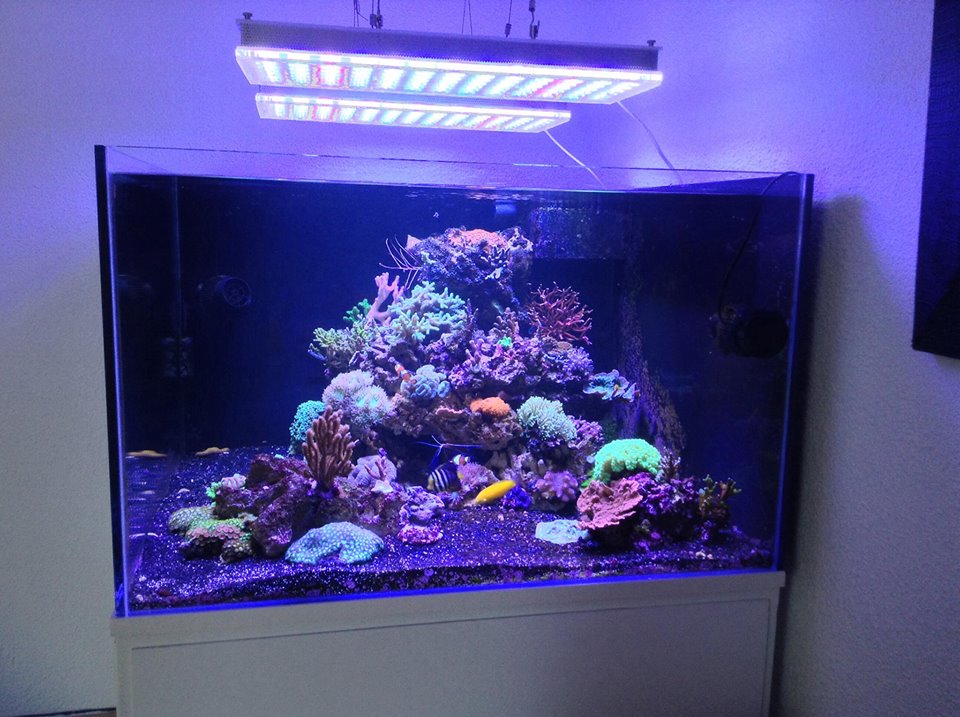
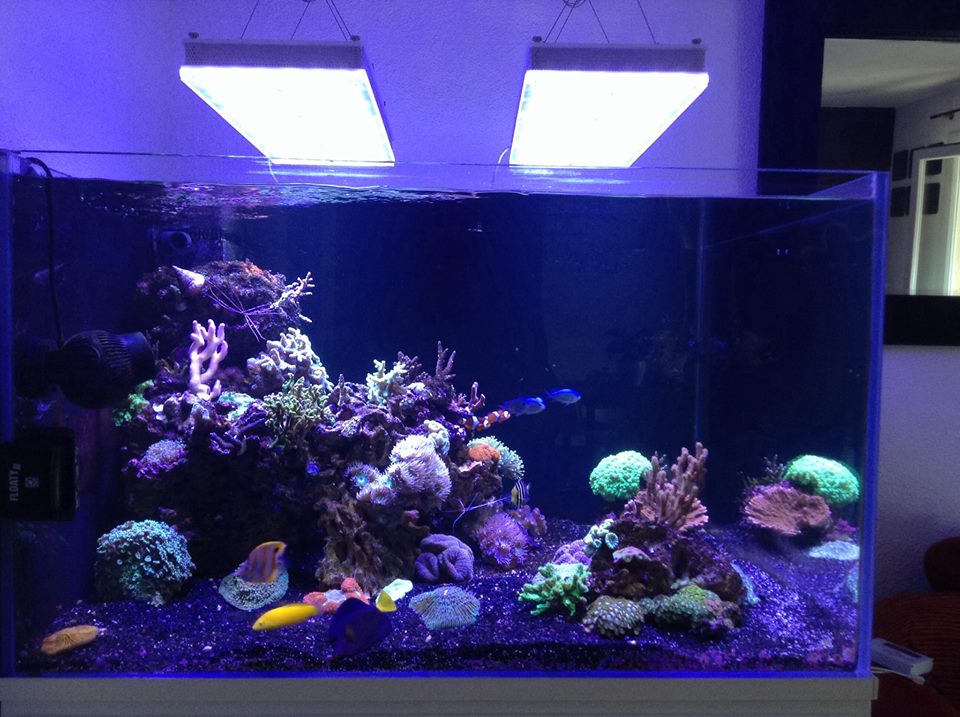
Orphek cares about your corals and most importantly the correct lighting and spectrum required for fast growth and excellent color.  We have put together some tips in hopes of making your selection easier and more knowledgeable.  When choosing corals, base your selection on your current level of knowledge and ensure you can provide the needs required by a particular species of coral.

  • When shopping, look for corals with full-extended polyps that appear fleshy.  Avoid LPS corals with dead spots on the skeleton and/or dying retracted heads.  Generally this malady can and will soon spread to other areas of the coral and kill the entire colony.  If you must purchase a coral in this condition, remove the dying heads which will offer a much better chance of survival in your system.


  • When acclimating your corals, care must be given to their handling as some corals have a very thin fleshy membrane that is easily cut or damaged.  Fine coral sand is always recommended as a base for placing bottom dwelling corals such as Brain Corals, etc.  Elegance Corals are also noted for cutting easily on rough or coarse sand beds.

  • Give your coral(s) plenty of time to acclimate to water temperature and most importantly water chemistry.  Drip acclimation is recommended.

  • Avoid unwanted hitchhikers by dipping your corals in a Lugol’s solution bath before placing in your system.

  • Place your corals in your aquarium based on the light intensity and water flow required for that species.  Once again, be careful when placing LPS corals that are capable of extending sweeper tentacles.

  • Feeding.  There are a myriad of coral foods available and are continually improving in nutritional value based on the corals needs.  Some corals require little or no feeding while some will require frequent feedings.  It is always best to research the needs of a coral you are interested in before purchasing it.  This will save you grief and money.

The above is just a basic primer to help you better understand different groups of corals and their requirements and is geared more toward the novice reef keeper.  Orphek has several coral related articles that can be found on our sight which will help you in becoming a very successful reef keeper.

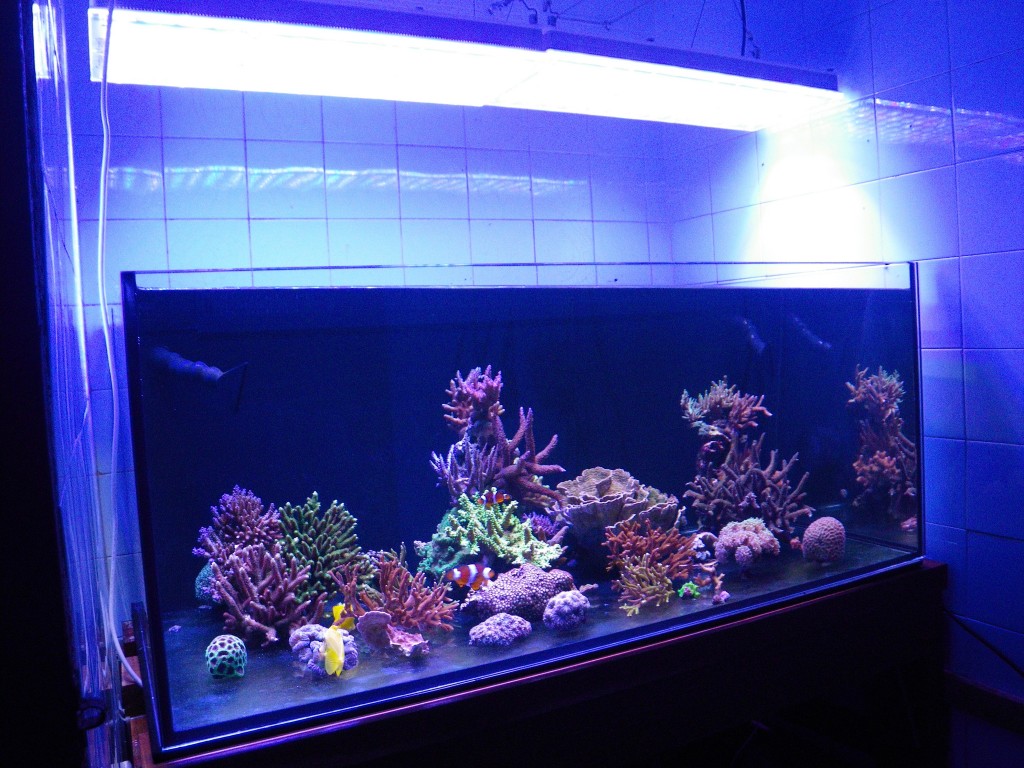
Orphek has been providing reef keepers with the ideal LED lighting systems for growing all types of corals fast and exhibiting stunning color.  We strive to continually provide articles and news items related to the reef keeping hobby and science; and most of all, to help you the hobbyist succeed.

Lps-Coral


Atlantik Compact Wifi is now available

The NEW Aquarium LED Lighting  Atlantik Compact Wifi is now available !!!


Orphek-Atlantik-compact


This unit is the little brother of the full Size Atlantik v2.1 wifi but make no mistake about it, it's a coral growing machine.

With full integration of the Orphek app. ,

4 channels of control and a spectrum designed specifically for coral growth and color, the Compact is about to change your reef forever.

Read a Review : https://orphek.com/aquanerd-unboxing-orphek-atlantik-compact/

Product Page : https://orphek.com/atlantik-compact-wifi/ 


Orphek-Atlantik-compact Orphek-Atlantik-compact Orphek-Atlantik-compact Orphek-Atlantik-compact

  • 42 customized high efficiency power LEDs

  • žWi-Fi/ WLAN/ Wireless technologies

  • Android technology

  • Built-in battery backup memory

  • High efficiency Mean Well drivers

  • Eight pre-installed programs & four channels

  • Full dimming capacity in all channels

  • Large storage with capacity for additional programs

  • Ability to program multiple units of Atlantik simultaneously

  • Dawn to dusk & cloud simulators

  • Highest PAR/PUR 

  • Ideal Spectrum for coral growth, color & health

  • 8 Different types of LEDs

  • New blue/cyan for more fluorescence coral color

  • 12 exclusive Dual-Chip UV/violet/white LEDs with increased intensity of Lm/w

Wednesday, June 25, 2014

Aquanerd - Unboxing the Orphek Atlantik Compact

Unboxing the Orphek Atlantik Compact |By Brandon Klaus Aquanerd |

It’s unboxing time once again, with our newest toy to play with being the Atlatik Compact WiFi LED fixture from Orphek. This compact light is essentially a shorter version of the popular Orphek Atlantik, offering the same spectrum and efficience but packaged in a smaller light.

It sports a whopping 42 emitters broken down into 8 different colors and spread across four channels of control. It has wireless capabilities built-in, allowing users to control each of those color channels via any Android powered device running the Orphek app.

Orphek-Atlantik-Compact-LED-light-aquanerd


Speaking of all the possibilities, with the use of the Orphek app and an Android device (tablet or phone), each of the channels on the Atlantik Compact can be individually controlled.

The light features eight pre-installed programs, full dimmin capacity on all channels, the ability to create and store custom lighting programs, elaborate dawn-to-dusk programs, cloud simulator programs, and the ability to control up to 252 Atlantik fixtures simultaneously.

Other benefits associated with the fixture and its software are the face that each light fixture is assigned its own IP address, aquariums can be located in different areas as long as they are in the range of the wireless router, and a built-in calendar lets users store up to eight programs per month. Man that seems like a mouthful ...

Read more

Regarding the light output of the Atlantik Compact, the one thing about the Orphek fixtures is they are ridiculously bright. Thank goodness for the added dimmability.

When the light first arrived, I decided to play a little joke on my wife. So, I removed the lid from the 12-gallon nano aquarium that sits on my kitchen counter and set the Atlantik Compact directly on top of it and turned it on. She walked by, squinted her eyes, and commented that it was just too bright.

After all, it was competing with the stock lighting from a JBJ LED Nano-cube, which are perfectly suitable for maintaining coral growth but are obviously not all that bright.

I informed her of the prank, not wanting to stay on the couch (I kid, I never have to sleep on the couch), and proceeded to give the light a good once over before finding the next aquarium over which it would stay.

Orphek-Atlantik-Compact-LEDs

Thanks For Aquanerd for the post review:

http://blog.aquanerd.com/2014/06/unboxing-the-orphek-atlantik-compact-picture-intensive.html 


Orphek Atlantik compact product page :

https://orphek.com/atlantik-compact-wifi/


Sunday, June 22, 2014

Aquarium Maintenance

Aquarium Maintenance, a Reason Why Tanks Can Crash


There are several reasons for this, we feel one of the leading reasons is lack of maintenance.  When a hobbyists first sets up his reef tank he is very excited and meticulous about how things look, cleanliness, and water parameters.

Aquarium-Maintenance


The hobbyists will start out by removing any obvious growth on the glass and test water parameters daily.  Soon the tank develops into a very appealing looking tank making it very pleasant to look at.  Because of the success of the system and seemingly like nothing can go wrong, the hobbyists slowly increases the time between water changes, glass cleaning, dosing additives and so on.  Then one day the dreaded brown slime algae begins to coat the rock work and water parameters are off the chart, pH is often dropped to 7.6 to 7.8, dKH is low, and a 3 to 1 balance does not exist between calcium and magnesium; phosphate levels are high, and by high, we mean if you can read it on your test kit, it is high.  In some cases bubbles can rise from the sand bed to the water surface.  This is not good for fish or corals; it is gas being formed by hydrogen sulfide in the sand bed.  Waste is being formed faster than it can be removed.


What did I do wrong the hobbyists asks?  The answer is to basically return to the day when you first set your tank up and perform maintenance religiously.  Keep the skimmer reaction chamber clean, change mechanical filter media weekly and at this stage, weekly water changes are recommended.  The use of a good grade of carbon or chemical media is also recommended and should be changed at least once a month depending on the livestock load in the tank.


So what is the best way to clean and maintain a tank to keep it healthy?  To keep that beauty you once had you must do preventative maintenance on a weekly basis just as you did in the initial weeks of your tank build.


Water Changes


Most successful reef hobbyists will change 10% of the water every fortnight (two weeks).  If that does not fit into your schedule then 25% to 30% should be changed monthly. The recommended way to prepare water for a water change is to make enough R/O water ahead of time.  Tap water is not recommended.  It can contain many impurities and phosphates.  If you must use tap water, have it analyzed for its content before using it.


Place the water in your mixing tank or barrel and aerate it for 24 hours.  We do not mean you must aerate with an airstone, but to use a powerhead and circulate the water well which will give a constant air exchange with the surface of the water.  Place a heater into your mixing tub and bring the water up to the same temperature as your display tank.  The pH difference between your tank water and new water should be kept as close as possible.  After 24 hours you can now add the salt and mix to the specific gravity of your display tank.  After the salt is fully dissolved and the water is clear you can begin the water change.


It is best to use a gravel type cleaner siphon for removing the water so you can stir up the gravel and suck out any debris or waste.  You will have to use your thumb and forefinger on the tube to control the volume of siphon so you only suck out a small amount of the sand, preferably none but this is almost impossible to do.  You can always add a little more sand to make up any loss.  This is also a good time to remove anything from your rock that does not belong there.  Stiff bristle toothbrushes work well for this.  This is also a good time to check the weirs (combs) on your overflow box and remove any debris that they may have trapped.


Once you have removed the amount of water you want to change you can slowly add the new water to the tank.  After 24 hours it is a good idea to check water parameters and compare to your previous tested water parameters.  A 24 hour period allows the new water chemistry to stabilize.  This is also a good time to change your filter and chemical media if it is due to be changed.


Cleaning Glass


One of the best tools for cleaning glass is magnetic glass cleaners and be sure you select the proper size for your glass thickness or it will not be effective.  The magnetic cleaners cannot get at corners so a cleaning pad is suggested to remove algae in the corners.  If your tank is acrylic, be sure to choose a pad or magnetic cleaner that is safe for acrylic.

MAG-FLOAT

Another reason that can lead to tank crashing is lack of proper equipment and poor circulation which leads to stagnant areas of the tank.  Protein skimmers should be chosen based on their effectiveness and the skimmer selected should be rated for at least 1.5 times the actual volume of your tank.  There is no such thing as overskimming. For water flow, the total volume of all pumps should equal at least 10 times the volume of your tank.  Wavemakers or programmable pumps are highly desirable as they prevent stagnant areas from forming in your tank.


If one follows the basic maintenance stated above your tank will be a much healthier tank and be a pleasure to look at.  There are advanced chemistry media/bacteria that can further help you in keeping a clean tank.  Once such product is Brightwell’s Micro Bacter 7.  Basically it is a liquid based bioculture for establishing biological filtration which rapidly improves water quality.

Thursday, June 19, 2014

Acclimating your aquarium to LED lighting

When switching your tank to LED lighting such as the Orphek line of products, it is important to keep a few things in mind to ensure success. Implementing a daylight schedule that transitions the tank to your new lights will create less stress on you livestock. LED lighting is often much more intense than metal halide or T5 but corals and fish can adapt well if a few simple principles are in place during the transition. acclimating-your-aquarium-to-led-lighting
 Installation- proper installation of your new lights is something that will give you options for adjustment later. When planning your mounting, allow yourself the ability to raise and lower the lights if possible. Raising/lowering the light will give you the ability to adjust coverage of the tank and the intensity of the light in the tank. You will need this ability later.   You can also use angle to get the exact look that you want in your tank. Bringing the fixture forward and tilting the front edge down (figure 1.1) will allow you to reduce the amount of light on the front glass, direct more of the light onto the front face of your live rock structure and because of the angle; you will have more consistent PAR throughout the tank. Reducing the amount of light on the front glass also reduces the amount of algae you have to remove from the glass during your regular tank maintenance. acclimating-your-aquarium-to-led-lighting
Fig. 1.1
Adjusting the light- The next step is to get the look and intensity that you want. If your light is dimmable this is the time that you will determine the peaks in your light schedule. Begin by adjusting the different channels to achieve the “perfect” look. Be sure to include each channel to maximize the results in your tank. Think of it as “High Noon”, at the peak of your light cycle, what do you want the tank to look like? Once you have this dialed in, write down the percentages that you have each channel at. This will become the peak percentages that your light schedule uses. Keep in mind that you do not have to run any fixture at 100%. All too often people run their fixtures at 100% because they don’t understand the amount of light that is really going into their tanks, this can result in corals that eventually bleach due to too much light. It is better to start low and raise the amount of light. Green-coral-aqurium-led-lighting Owners of existing systems need to be mindful of the intensity that leds offer and ensure that they do their best to duplicate the previous intensities. The use of a PAR meter is often helpful in this task. Many clubs and stores have units that can be borrowed or rented. There are even online rentals that can be found.   Schedule- Now that you have the peaks planned, it’s time to determine the overall schedule of your lights. This is different for every tank and is often based upon the lifestyle of the owner. If you are an early riser and like to see your tank in the morning then your schedule will begin early. If the tank is in an office setting then the tank should match the office hours to allow visitors and staff to see the tank in all its beauty. If you are installing the lights on an existing system then you need to work to get it as close to the old schedule as possible. LPS-coral-LED-Lighting In this example we are going to plan the light schedule for a typical household that gets up and off to work early but has evenings at home when the owners wish to see the tank. They also like the blue moonlights and fluorescent look that they give in the evenings just before lights out. The family typically goes to bed shortly after 11pm.
Schedule-LED-Light
Fig. 1.2    You can see in figure 1.2 that there are three channels that will be combined to create the daylights, channels 1, 3 and 4. They are set to peak at 75 % and run this from 2pm to 8pm with one hour of dimming before and after the cycle.   In figure 1.2 you can also see that channel 2 is the blue LED channel, that the peak is 100% and set to run from 11am – 9pm, with 3 hours of ramp up and 2 hours of ramp down. You will also notice that there is a 1/2 hour from 10:30pm to 11pm in which the blue leds go from 10% to 0%. This gives the last little bit of light for the end of the day, just like the last ½ hour after sunset before it gets dark. We do not recommend running the blues or any moonlight all night. Corals and other animals need time rest. Nocturnal animals also need their time to do what they do and too much light can inhibit this. Blue-sps-coral-LED Implementation and Adjustment- Now that we have our full cycle planned and the lights installed we can put the plan in action. Begin by programming the cycle into your lights and letting it run for several days. Be sure to check your corals each day. Checking polyp extension is often a good way to determine if corals are happy. Open polyps and swollen corals can indicate that they are happy with the light they are receiving. Hidden polyps, shrunken soft corals and corals that retract in the middle of the day are often signs of too much light. Watching your tank daily will help you to make a determination of what is needed and allow you to make small changes to reach the maximum potential. Changes should always be made gradually (unless there is a very strong reason for doing them quickly). Changing light schedules and intensities us also something that should be done as little as possible Consistency will bring success and changing these will cause a little stress each time that it’s done. Typically one can wait 1-2 weeks between adjustments to allow the corals to settle in, however, if your corals are not opening then you may need to reduce the amount of light that they are getting quickly to ensure that they are not damaged.   Reducing light- This can be done through several different methods. Each has its own benefit. We suggest raising the light or reducing intensity first before changing the actual time schedule.
  • Raising the light- increasing the height of the light above the water will lower the amount of light that is reaching the corals in the tank. This reduction is consistent throughout the tank and this is why it’s often the best option.
  • Reducing intensity- this option achieves the same results as raising the light but it also changes the peak look that you liked in the tank. If you reduce the amount of light too much it can appear too dim for your preference. We suggest reducing the intensity in 5% increments on daylight channels. Typically blue channels can be left are the original peak.
  • Reducing time- Changing the light timing can also be done but this could impact your enjoyment of the tank if it reduces your viewing time. If you need to reduce the amount of time we suggest doing it when you are not around the tank. Starting a peak at 3pm instead of 2pm will reduce 1 hour of time but will not affect the viewing time if no one is at home. You can also move the peak time from 2pm to 3 pm but leave the beginning time at 12pm. This will give you 3 hours of ramp up time instead of 2.
  • Individual corals can be moved around to accommodate their own sweet spots. If the rest of your corals are showing positive signs then you can move unhappy corals around to find the best spot for them. This can often be as much about water flow as it is about light.
sps_coral_LED_aquarium Increasing light- This can be done easily now that you have installed the light correctly and programmed the unit based upon peak. As you acclimate your corals to higher intensities they will often increase in coloration. You can experiment with this by placing frags of some corals in different locations of the tank. We suggest using increasing the time schedule or intensity before lowering the light.
  • Increasing the intensity is easy to do since you did not max the fixture out at 100% when doing the initial setup. Adding an additional 5% at a time on the daylight cycle will often add enough light to address any issues you may be seeing (soft corals reaching for the light, Anemones moving in search of more light, SPS corals losing color).
  • Increasing the light schedule in 15 minute increments can also give the tank more light by adding to the total amount of light the corals can take in throughout the day.
  • Lowering the light is another thing that can be done. Doing this can reduce the coverage of the tank and this is why we recommend it as a last step.. Lowering the light can drastically raise the amount of PAR reaching the corals. Hot Spots can increase as well so it’s important to be very careful when using this method. This is often a good indicator that you have not put enough light over your tank and is seen a lot when trying to light larger tanks with smaller hobby related lights. Some companies often rate their fixtures to cover more area than they are actually able to cover with useful amounts of light.  If you purchase 2 units of a company’s lights with the expectation that it will provide for SPS and it doesn’t then you will need a third and chances are that you will buy that third unit from the same company which means additional expenses for you and profit for them. This is where understanding what you are buying and the capabilities ahead of time will save you headaches down the road.
  Now that you have installed, programmed and adjusted your lights you can relax and enjoy the results of your efforts. We hope this article has been helpful and encourage yu to contact us at info@orphek.com for any questions that you may have with implementation of your Orphek lights.

Acclimating your aquarium to LED lighting

When switching your tank to LED lighting such as the Orphek line of products, it is important to keep a few things in mind to ensure success. Implementing a daylight schedule that transitions the tank to your new lights will create less stress on you livestock. LED lighting is often much more intense than metal halide or T5 but corals and fish can adapt well if a few simple principles are in place during the transition.

acclimating-your-aquarium-to-led-lighting

Installation- proper installation of your new lights is something that will give you options for adjustment later. When planning your mounting, allow yourself the ability to raise and lower the lights if possible. Raising/lowering the light will give you the ability to adjust coverage of the tank and the intensity of the light in the tank. You will need this ability later.


You can also use angle to get the exact look that you want in your tank. Bringing the fixture forward and tilting the front edge down (figure 1.1) will allow you to reduce the amount of light on the front glass, direct more of the light onto the front face of your live rock structure and because of the angle; you will have more consistent PAR throughout the tank. Reducing the amount of light on the front glass also reduces the amount of algae you have to remove from the glass during your regular tank maintenance.
acclimating-your-aquarium-to-led-lighting
Fig. 1.1

Adjusting the light- The next step is to get the look and intensity that you want. If your light is dimmable this is the time that you will determine the peaks in your light schedule. Begin by adjusting the different channels to achieve the “perfect” look. Be sure to include each channel to maximize the results in your tank. Think of it as “High Noon”, at the peak of your light cycle, what do you want the tank to look like? Once you have this dialed in, write down the percentages that you have each channel at. This will become the peak percentages that your light schedule uses. Keep in mind that you do not have to run any fixture at 100%. All too often people run their fixtures at 100% because they don’t understand the amount of light that is really going into their tanks, this can result in corals that eventually bleach due to too much light. It is better to start low and raise the amount of light.

Green-coral-aqurium-led-lighting

Owners of existing systems need to be mindful of the intensity that leds offer and ensure that they do their best to duplicate the previous intensities. The use of a PAR meter is often helpful in this task. Many clubs and stores have units that can be borrowed or rented. There are even online rentals that can be found.


Schedule- Now that you have the peaks planned, it’s time to determine the overall schedule of your lights. This is different for every tank and is often based upon the lifestyle of the owner. If you are an early riser and like to see your tank in the morning then your schedule will begin early. If the tank is in an office setting then the tank should match the office hours to allow visitors and staff to see the tank in all its beauty. If you are installing the lights on an existing system then you need to work to get it as close to the old schedule as possible.

LPS-coral-LED-Lighting

In this example we are going to plan the light schedule for a typical household that gets up and off to work early but has evenings at home when the owners wish to see the tank. They also like the blue moonlights and fluorescent look that they give in the evenings just before lights out. The family typically goes to bed shortly after 11pm.


Schedule-LED-Light
Fig. 1.2


You can see in figure 1.2 that there are three channels that will be combined to create the daylights, channels 1, 3 and 4. They are set to peak at 75 % and run this from 2pm to 8pm with one hour of dimming before and after the cycle.


In figure 1.2 you can also see that channel 2 is the blue LED channel, that the peak is 100% and set to run from 11am – 9pm, with 3 hours of ramp up and 2 hours of ramp down. You will also notice that there is a 1/2 hour from 10:30pm to 11pm in which the blue leds go from 10% to 0%. This gives the last little bit of light for the end of the day, just like the last ½ hour after sunset before it gets dark. We do not recommend running the blues or any moonlight all night. Corals and other animals need time rest. Nocturnal animals also need their time to do what they do and too much light can inhibit this.

Blue-sps-coral-LED

Implementation and Adjustment- Now that we have our full cycle planned and the lights installed we can put the plan in action. Begin by programming the cycle into your lights and letting it run for several days. Be sure to check your corals each day. Checking polyp extension is often a good way to determine if corals are happy. Open polyps and swollen corals can indicate that they are happy with the light they are receiving. Hidden polyps, shrunken soft corals and corals that retract in the middle of the day are often signs of too much light. Watching your tank daily will help you to make a determination of what is needed and allow you to make small changes to reach the maximum potential. Changes should always be made gradually (unless there is a very strong reason for doing them quickly). Changing light schedules and intensities us also something that should be done as little as possible Consistency will bring success and changing these will cause a little stress each time that it’s done. Typically one can wait 1-2 weeks between adjustments to allow the corals to settle in, however, if your corals are not opening then you may need to reduce the amount of light that they are getting quickly to ensure that they are not damaged.


Reducing light- This can be done through several different methods. Each has its own benefit. We suggest raising the light or reducing intensity first before changing the actual time schedule.

  • Raising the light- increasing the height of the light above the water will lower the amount of light that is reaching the corals in the tank. This reduction is consistent throughout the tank and this is why it’s often the best option.

  • Reducing intensity- this option achieves the same results as raising the light but it also changes the peak look that you liked in the tank. If you reduce the amount of light too much it can appear too dim for your preference. We suggest reducing the intensity in 5% increments on daylight channels. Typically blue channels can be left are the original peak.

  • Reducing time- Changing the light timing can also be done but this could impact your enjoyment of the tank if it reduces your viewing time. If you need to reduce the amount of time we suggest doing it when you are not around the tank. Starting a peak at 3pm instead of 2pm will reduce 1 hour of time but will not affect the viewing time if no one is at home. You can also move the peak time from 2pm to 3 pm but leave the beginning time at 12pm. This will give you 3 hours of ramp up time instead of 2.

  • Individual corals can be moved around to accommodate their own sweet spots. If the rest of your corals are showing positive signs then you can move unhappy corals around to find the best spot for them. This can often be as much about water flow as it is about light.

sps_coral_LED_aquarium

Increasing light- This can be done easily now that you have installed the light correctly and programmed the unit based upon peak. As you acclimate your corals to higher intensities they will often increase in coloration. You can experiment with this by placing frags of some corals in different locations of the tank. We suggest using increasing the time schedule or intensity before lowering the light.

  • Increasing the intensity is easy to do since you did not max the fixture out at 100% when doing the initial setup. Adding an additional 5% at a time on the daylight cycle will often add enough light to address any issues you may be seeing (soft corals reaching for the light, Anemones moving in search of more light, SPS corals losing color).

  • Increasing the light schedule in 15 minute increments can also give the tank more light by adding to the total amount of light the corals can take in throughout the day.

  • Lowering the light is another thing that can be done. Doing this can reduce the coverage of the tank and this is why we recommend it as a last step.. Lowering the light can drastically raise the amount of PAR reaching the corals. Hot Spots can increase as well so it’s important to be very careful when using this method. This is often a good indicator that you have not put enough light over your tank and is seen a lot when trying to light larger tanks with smaller hobby related lights. Some companies often rate their fixtures to cover more area than they are actually able to cover with useful amounts of light.  If you purchase 2 units of a company’s lights with the expectation that it will provide for SPS and it doesn’t then you will need a third and chances are that you will buy that third unit from the same company which means additional expenses for you and profit for them. This is where understanding what you are buying and the capabilities ahead of time will save you headaches down the road.


Now that you have installed, programmed and adjusted your lights you can relax and enjoy the results of your efforts. We hope this article has been helpful and encourage yu to contact us at contact@orphek.com for any questions that you may have with implementation of your Orphek lights.

Monday, June 16, 2014

Rimless Aquarium with LED lighting

New Rimless Aquarium With Orphek ATlantik V2.1


One of our representatives in France recently installed a new reef system for his client in France.

The customer is very pleased with the lighting and what it can do for his corals.

The installer, Reefgreen Tech, has installed many reef systems using Orphek ATLANTIK .


rimless-aquarium-with-led-lighting

Led-aquarium-lights LED-aquarium-lighting